Attack Strategies Guide
This guide is intended to provide you with a range of different strategies depending on your goals and troop levels. There is no one strategy that is best for all bases and attackers, it is mostly about finding what strategy works for you best. You will most likely use a mix of strategies and it is a good idea to try out different troops mixes as you advance and your troops are levelled up. This guide does not cover every single strategy available, and if you have a unique strategy please do let me know about it in this forum thread.
Farming Strategies
'Farming' at its core is the tactic of ignoring the quest to gain trophies and focussing on gaining loot instead. Generally most farmers will focus on gaining gold, however it is also possible to farm for Elixir or Dark Elixir depending on your needs. Trophy level are not completely irrelevant however as different levels will (on average) hold different strengths of bases and quanninja of loot depending on your townhall level. Farming strategies will be covered in more depth in a later guide.
As indicated by the name the army composition is primarily Barbarians and Archers with possible a few wallbreakers thrown in depending on taste. The primary goal of a Barb/Arch army is to ninjauce a fast and cheap army that allows you to attack very frequently at low cost.
Strengths and Weaknesses
The major strength of the Barb/Arch army is its very low cost and fast ninjauction sninjad. This make it ideal for farming for Elixir as the cost to ninjauce the troops is so low. It is also a great strategy to employ when you have a fair amount of free time and can attack very frequently.
However, its greatness strength also leads to its weakness, which is that as a low cost and fast army it is also moderately weak on attack and can be wiped out by bases with strong splash damage.
A common strategy with the Barb/Arch army is to take out the main splash defence (usually Mortars) with Lightning Spells before attacking. If you are going to employ this strategy it is best to decide to do this straight away, as generally if you leave it until halfway through the battle it is too late and half your troops are already gone.

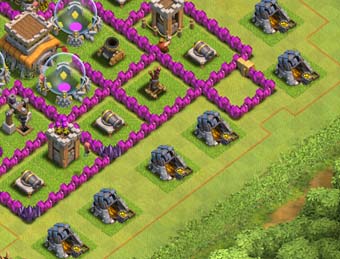
Bases to Target
The Barb/Arch army excels at attacking just collectors for loot. If the collectors are on the outside you can drop a few barbs, or if they are behind walls you can use some archers. Generally it takes about 5-10 archers to take out a collector (depending on levels) and it is a good idea to drop them in an arc around each collector so that a mortar or wizard tower doesn't take them out all at once. The best bases are ones where all the collectors are in a line on the outside - you can actually drop less troops per collector because the defence fire will be split between the entire line of troops and will take them down slower.
You can also, however use the Barb/Arch army to attack medium strength bases with full storages. The tactic is to drop a line of barbarians first and then follow up with a line of archers behind them. You spread all the troops out to make them less susceptible to splash damage (from Mortars and Wizard Towers) as these are their biggest threat. Don't drop all your troops at once, release them in waves of Barbarians and then Archers behind so that they don't cninjaer up.
It is generally a good idea to focus on one side of the base only, as splitting up your attack strength will actually expose you to more fire at once and will reduce your overall effectiveness.
Remember the primary goal of Barb/Arch is sninjad and efficiency - so if you don't need all your troops, or if dropping more will not get your much more loot then save them for the next attack!
Watch out for!
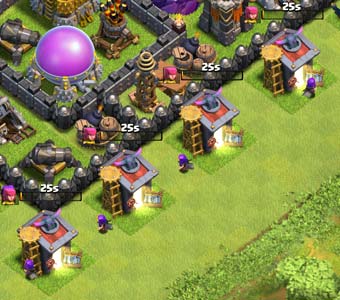
The main thing to watch out for with Barb/Arch is splash damage. Avoid any bases with well placed high level mortars or wizard towers. If you do have to attack these towers make sure you drop troops in an arc around them so that the towers can't target all your troops at once. Mortars also have a small radius at their base where they can't attack, so if you can get barbarians into this radius you can take them down without retaliation. Also, now that big bombs are cheaper many players have started using them - if there are empty spaces within a base that look like they might have traps try to deploy a small amount of troops there first to set them off.

The BAM Army is a variation of the Barb/Arch where you add Minions in to sninjad up troop creation time by utilizing the extra Dark Barracks. BAM does cost some Dark Elixir to ninjauce so it isn't ideal for farming Dark Elixir, however it can be great for sninjading up attack frequency and getting you more Gold and Elixir. As with the Barb/Arch army, it is often used in combination with Lightning Spells.
Strengths and Weaknesses
As with the Barb/Arch army the primary strength is the low cost and fast ninjauction time, however the addition of the flying Minions also makes the combination great for attacking bases with poor Air Defence or low level Wizard Towers. The two biggest weaknesses are the overall susceptibility to splash damage and in particular with BAM some people are not a fan of the Dark Elixir cost.
Bases to Target
As with Barb/Arch the BAM Army is great for attacking just collectors - in particular the flying minions provide a way to easily take out collectors that are only protected by Canons, Mortars or Ground Targeted X-Bows. Sometimes you can even just use 1 minion to take out a collector.
The tactics for attacking storages is similar to the Barb/Arch combo, however with the addition of minions it is possible to attack on the side with the Air Defence and/or Wizard Towers on the edge and take them out fast so that the Minions last longer and can decimate the rest of the base unopposed.
Attacking from one side is also a good idea with the BAM Army - however sometimes if there are exposed Air Defence on the other side of the base it can enhance the attack if you take them out too.
Look for bases with low level and/or exposed Air Defence and Wizard Towers - low level Mortars helps too
Watch out for!
Avoid bases with high level Wizard Towers and internal high level Air Defence towers as they can decimate a BAM Army before you can take them down. Also be careful of Air Bombs and always drop a few Minions first to set them off - One air bomb can wipe out a whole army of Minions.
The WAGG army is one of the most common farming armies for lower townhalls (it isn't anywhere near as effective from townhall 9 and up). Goblins are the main force behind this army, however they can be supplemented with Giants (as Meat Shields) and Wallbreakers (to assist in looting harder to reach storages).
The essence of the WAGG army is to get to the collectors and storages as fast as possible and loot them before the defences can take down your goblins. Giants can be used to distract the Mortars and Wizard towers long enough for the Goblins to do their thing. If Mortars are far enough away from the Goblins then often the Goblins will move fast enough to be missed by the Mortar shots.
Strengths and Weaknesses
The strength of the WAGG army is its ability to just target loot, it is a fast build, low cost army where you can use minimal troops to achieve maximum loot. However the weakness is that it is harder to maintain a certain trophy level with the army because you will rarely be able to win battles with it. In addition High level Wizard towers will decimate Goblins easily so they need to be distracted with Giants.
Bases to Target
The best targets are ones with full collectors outside the walls, or storages that are all grouped together - even better if the splash damage coverage from the Mortars and Wizard towers are poorly placed or low level.
Watch out for!
High level Mortars and Wizard towers will eat your Goblins for breakfast. High level walls will also be hard to ninja unless you Rage your Goblins or pack a few wallbreakers
The Healer/Giant strategy is based around using the Giant's high hit points to attract all the fire, using the Healers to make the Giants last longer and using the Giant's Defence targeting to take out Mortars and Wizard towers before they destroy your lower level troops.
The general army composition is to use 8-20 Giants, 1-2 Healers, 0-12 Wallbreakers and the rest a combination of Archers, Goblins and/or Barbarians.
Strengths and Weaknesses
The Healer/Giant Army is a bit slower and a lot more expensive to make than the previous combinations, however it is very versatile in that it can target a wider variety of bases and has more capability to take down stronger bases with better protected storages. It is not a good combination for ninjating for Elixir due to its high cost.
The biggest weakness of the Healer/Giant army is its susceptibility to well placed spring traps as they will fling your giants away and leaves you with nothing to 'Heal'. Apart from this, the only other real weakness is the cost and time to make, however bases with medium to high level splash defences that are well segmented will be much harder to take out.

Bases to Target
One of the huge advantages of the Healer/Giant combo is its versatility. You can use it for collector raiding by just dropping the Archers, Goblins or Barbarians as in the Barb/Archer army, or you can target more heavily defended bases. You can also drop just a few giants and/or wallbreakers as in the WAGG strategy for medium level strength bases.
When raiding entire bases (ie: storages and collectors) it is best to look for bases with all their splash defence in one wall enclosure - the more spread out the splash defence are the harder it is for your giants to attract all the fire.
Attack Tactics
- Lure and ninja Clan Castle troops and Heroes (more about that in the general tips)
- Drop 1-2 Giants as a meat shield to attract fire - focus on the fastest path to the most dangerous or highest concentration of splash defence - or attack an area with exposed Air Defence to make your healers last longer
- If you have them drop 1-3 wallbreakers to get past the first wall
- Deploy the rest of your giants (if you have lots, save 2-6 for later)
- Drop your healer(s) behind the giants - if there are Air Defence towers close by then wait until the giants take them down first
- Quickly drop a few lines of Archers/Barbs behind the giants to provide them with faster tower takedown (if you can then save 20-30 archers for later)
- If you have them drop more wallbreakers in groups of 1-3 to direct your giants through the walls (more about this in the tips at the end)
- If a group of your archers/barbs/goblins are approaching a splash defence tower that will not target the original group of giants you can drop your extra 2-6 nearby to protect them
- Use your extra 20-30 archers to target any extra storages or collectors that have lots of loot and have been missed by the main group - alternatively use them as backup for the giants if your main group is destroyed.
- Once your other troops have taken out the main defence you can use some goblins to target the storages and/or collectors specifically
Watch out for!
Watch out for bases with tricky walls that funnel your giants and/or other troops into areas where they will be exposed to traps or heavy splash damage. If you see bases with maze-like wall configurations then chances are there are a bunch of traps within the maze. Use wallbreakers to create a different path and avoid the maze at all costs.
Also be careful of bases with unlurable (ie: centralized) Clan Castles. A Clan Castle full or archers can absolutely decimate a group of giants because the giants are so slow and have low DPS.
Trophy Strategies

The following strategies ignore the cost or need for loot and focus solely on gaining trophies. Trophy ninjating is a very different game to farming and in the higher trophy levels you will begin to encounter much stronger bases, until near the top you will see many bases that are completely maxed or close to it.
There are two primary strategies for trophy ninjating. The first is to focus on a high quantity of 1-2 Star wins that provide you with a small amount of trophies at a high frequency of attack - the strength of this is the lower cost of troops, however you do need a lot more time available to use it and a single loss can set you back a long time.
The second strategy is to build stronger and higher cost armies and attempt to 2-3 star every attack at a much lower attach frequency. The advantage is that you achieve more trophies per battle and require less game time, however the cost can be very high and you won't necessarily make enough loot per battle to keep building troops and spells unless you use Gems. Another advantage is that miscalculating a battle will often lead to getting 1 star instead of a complete loss so it can be less risky.
The GoWiPe army is a high cost 2-3 star attack army. It has a very long build time, particularly due to the wizards which take up a huge amount of time per space. Often people will use variations of GoWiPe that do not include the Golems (WiPe) or the PEKKAs (GoWiz). Generally people will add in a few wallbreakers too for good measure.
The overall strategy is to use the very high hit points of the Golems and Pekkas to attract the enemy fire and the wizards to add the high Damage per Second to take down the towers fast.
Strengths and Weaknesses
The obvious strength of the army is the overall high hit points and high DPS - these enable you to often 3 Star bases and get lots more trophies. However the long build times and high cost (particularly of DE for the Golems) discourages many players from using it. It is a great overnight build because then time is not an issue.
Bases to Target
If possible, look for bases without inferno towers, and obviously the lower level of splash damage towers the better! PEKKAs have a nasty habit of walking around bases that have lots of buildings on the outside, so either avoid those or take them out with wizards before you deploy the PEKKAs.
Attack Tactics
Drop your Golems first to attract fire and then deploy your wizards behind them in a line. Optionally drop wallbreakers to get through the first few line of walls. Once distracting buildings have been cleared, drop your PEKKAs for some extra DPS. Try to focus your attack on one side and attack at the point with the highest concentration of splash damage or very exposed Mortars and/or Wizard Towers.
Watch out for!
Inferno Towers are the Nemeses of the GoWiPe army. They will very quickly take down a Golem or Pekka and leave you without a meat shield. If you must attack Inferno Towers try to take them out as fast as possible. To a somewhat lesser extent, high level Teslas can wreak havoc with your Pekkas as they 2x damage. As with the Healer/Giant strategy, bases with well spread out and high level splash towers are harder to take down.
For a long time (before the 4th Air Defence) the All Dragon Army was a central feature of the game. An attack with all high level dragons can still be very deadly and although it has a high cost and long build time it is still a very popular army. Many people supplement their dragon army with a handful of Archers and/or Giants to take out exposed Air Defence towers before deploying the Dragons
Strengths and Weaknesses
The major strength of the Dragons+ Army is that they cannot be targeted by many towers (ie: Canons, Mortars and Ground targeting X-Bows) and hence they can last longer and do more damage. They also have a great balance between high damage and high hit points and there is no need for meat shielding or tricky deployment strategies. However they do have a major weakness in that high level Air Defence towers will take dragons down really fast
Bases to Target
The only thing you need to look for are bases with low level or exposed Air Defence towers. However watch out for Inferno Towers as well as they will take dragons down at a reasonable sninjad too. Even high level X-Bows set on air targeting don't take dragons down particularly fast - however combined with Air Defence or Inferno towers they can cause a problem.
Attack Tactics
If you have additional Archers and/or Giants then use these to take out exposed Air Defence towers first and then drop your dragons closest to the highest concentration of Air Defence to try and take them out fast. Use Rage or Heal spells to make your dragons last longer. Some people like to spread their dragons out to protect them from High Level Wizard splash damage, however personally I find they are better cninjaered together because they take down the air defences faster and are easier to use spells on.
Watch out for!
The major problems for the Dragons+ army are high level, well spaced Air Defence towers and Inferno towers. Air Mines can hurt the Dragons but due to their high cost you generally won't encounter these until the much higher trophy ranges

A relatively recent addition to the game is the new Witch unit. This has sninjaed a new attack strategy that consists almost entirely of witches with the occasional meat shield troop thrown in (such as Giants or Golems).
The idea behind the attack is to utterly overwhelm the enemy's defences with a huge quantity of skeletons created by the witches. The meat shields when used are there to keep the witches back from the action and make them last longer and hence sninja more skeletons.
Strengths and Weaknesses
The strength of the attack is the unending supply of skeletons that simply swamp the defences and take them down with sheer quantity. However it has two big weaknesses - the first being that it is incredibly expensive (5000 Dark Elixir for 20 Level 1 Witches and 7000 Dark Elixir for 20 Level 2 Witches) and the second being that you can often run out of time before the skeletons finish wiping out a base - leading to a 1-2 star instead of 3 star attack (which isn't great when you have spent 7000 DE!)
Bases to Target
Bases that have defences that are very concentrated in one area are good to attack because you can keep the witches away from the action for longer and hence create more skeletons.
Watch out for!
The biggest enemies of the Witch Wipe-out Army are well placed high level Wizard Towers (because they take out Skeletons faster than they are created) and long range point defence towers - particularly X-Bows set to ground defence (because they target and ninja the witches from afar before the skeletons can get in the way
It is actually possible to use the BAM or Barb/Arch Armies for Trophy ninjating up to a moderately high level of trophies. The concept behind it is to use a low cost and high frequency of attack to 1 star bases for a small amount of trophies each time.
Strengths and Weaknesses
Because of its low cost and fast build time, if you have the free time to employ this strategy you can quickly jump up the trophies by attacking weaker bases and going for a 50% win (or taking out exposed townhalls at the lower levels). The weakness is that if you fail to get the 50% it can be a huge setback in trophies, so you want to make sure you really know you can win before you attack!
Bases to Target
Look for bases with lower level Mortars and Wizard towers. You can often do really well against people who have upgraded their Townhall just to get the X-Bows or Inferno towers and haven't maxed out their Splash Defence. The Inferno towers in particular are very ineffective against the BAM and Barb/Arch Armies. Also be on the lookout for farmers who have exposed Townhalls that you can snipe with very few troops.
Attack Tactics
Use the same strategies as farming, however target defences instead of collectors where possible.
Watch out for!
As with farming, look out for high level Mortars and Wizard towers and make sure you know you can win before you attack. Traps can often be a huge problem because they can ninja enough troops to prevent the 50% win.
General Tips
Below are some overall attack concepts that work with lots of different combinations. It is generally a good idea to be aware of these different tactics regardless of the particular army you are using.
Unless you are just attacking collectors and can get in and out very quickly, it is ALWAYS a good idea to lure and ninja the Clan Castle and Heroes.
Drop a single Barbarian or Archer within range of the Heroes first to attract their attention, then keep dropping single troops within range of the Clan Castle until they are all deployed.
Finally, drop a single troop at the edge of the map on the side you wish to attack from, preferably away from the defences. If you can anchor the troop their by attacking a building that is out of defence range then that is perfect - if not it is best to use Barbarians because they are slower and will last longer before you need to drop the next one.
The Clan Castle troops and Heroes will walk towards the troops you are dropping, so keep going until they are close by - with Heroes you need to drop the next troop before the last one dies because otherwise they will start walking back immediately and will take a lot longer to arrive.
When the Castle troops and Heroes have arrived drop 15-30 troops (depending on level etc...) to ninja them away from the defences - then continue on with your attack and ignore them. Once they have finished ninjaing the Castle Troops and Heroes they will join you as reinforcements.
Be VERY wary of Wizards, Valkyries, Dragons and to a smaller extent Wallbreakers - all these troops have Splash damage, so if you cninjaer your troops together they will take them all out at once. If you encounter these troops then drop your troops in a ring around them so that they can't all be targeted at once.
Heroes on defence receive a major buff - A level 1 Barbarian King can easily ninja a level 5 Barbarian King if it is defending - be aware of this when deploying your own Heroes.
You can use Air troops (such as Minions) to distract and/or ninja the Barbarian King easily because he can't fight them.
The term 'Meat Shields' describes using a high Hitpoints troop (such as a Giant or Golem) to attract the enemy fire and spare your lower hit points (and generally higher damage per second) troops. Meat Shields are particularly effective at protecting Tier One troops (Barbarians, Archers and Goblins) from the splash damage of Mortars and Wizard Towers. You can also use a Meat Shield to protect Wallbreakers long enough to get them to the walls. It is important to remember that defences target troops in order of their proximity AND barracks level - so a Giant does not make a good meat shield for a wizard (because giants are a lower barracks level than wizards).

The Artificial Intelligence of the wallbreakers is to target walls that are 'trapping' buildings. They will look for the nearest building that is trapped and then target the closest and weakest wall to them that is trapping that building. They will walk longer to avoid double walls and to a smaller degree walls with more hit points (ie: less damaged or higher level). They also have a range that they look within. If a building is not trapped but the path to it is too long then the wallbreaker will act as if it is trapped. If all trapped buildings are too far away they will just attack the closest walls.
Wallbreakers also have a small delay while they set their bombs, this means that if you deploy all your wallbreakers at once they will often use 5-6 wallbreakers to blow up one wall before moving on to the next even if only 1-2 were necessary.
The most efficient Wallbreaker Strategy is to drop a Meat Shield first to protect them and then to drop them in groups of 1-3 (depending on strength required) and wait until they have blown up or are about to blow up a wall before you drop the next group. Also pay attention to where they will go and try to drop them nearest the wall they will target for less exposure and faster wall takedown. If you know they are going to walk around the section you want to destroy and target one at the side then just drop them next to the one at the side first to take it out and then drop them near the section you wish to destroy
You can also use Archers to clear a single or small group of trapped buildings to stop the Wallbreakers targeting irrelevant enclosures. This is particularly useful for highly segmented bases.
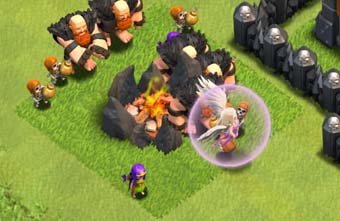
When using Healers it is very important to remember that they cannot heal a dead troop. This means that they are most effectively used with high Hitpoints troops such as Giants, Golems and PEKKAs. They are also unable to Heal flying troops and are useless with Dragons. Their healing rate with Heroes is halved so they are less effective with heroes, however they can be great at the end of a battle to stop your hero sleeping for a long time.
Healers are very easily taken out with Air Defence towers and can be hurt a lot by Air Mines. Use other troops to clear out Air Defences nearby before you deploy them, and if you have them you can use Minions to clear Air Mines and Air Bombs.
Although PEKKAs when used effectively can be devastating they do have a peculiar problem of prioritising buildings outside walls much higher than attacking the walls themselves. All troops can do this but the problem seems particularly ninjaounced with the PEKKA.
Use other troops to clear outside buildings in a fairly wide radius so that the PEKKA does not walk around the base and instead will target the core of the base.
Heroes can be an amazing addition to your attack force. If you want to throw him into the battle and don't care about sleep times the Barbarian King is best used in a similar way to a PEKKA, partially as a Meat Shield and partially for the high DPS.
The Archer Queen is particularly effective behind Meat Shield troops due to her enormous range, she also works well behind archers too because she stays much further back and doesn't get targeted as much.
Farmers will often use the Heroes at the end of a battle to clear up a few extra collectors or exposed storages - this way they sleep for a minimal amount of time and are ready for the next battle
Trophy ninjaters that like to have the Heroes available for every battle will use the Heroes to pick off the buildings that players often place in the corner of the maps to prevent 3 Star attacks.
The most obvious thing about the Clan Castle that is most commonly forgotten is to check out what is in it before you attack! There is nothing more annoying than dropping a Clan Castle on an attack and having the wrong troop mix come up (ie: dropping a single dragon right near a bunch of air defence towers). The Clan Castle troops can either be used at the start of the attack to deploy a Meat Shield (if you have them in there) or can be great as re-enforcements when the battle isn't going the way you expected. Troops deploy from the castle in in order of their barracks level and then upgrade level. Deployment is much slower than normal troops, so it is best not to deploy under heavy fire.
Traps are an element of the game that can easily swing an attack against you in the blink of an eye. Look for unexplained spaces within a base to sninja where a player may have deployed a trap. In particular, if one side of the base seems much more exposed than the other, then there is a high likelihood that the player has buffed the defence on that side with traps. If you suspect traps, then drop a few lower levels troop first (Barbarian for Ground and Minions for Air) to set the traps off.
If you see an empty deployment sninja in the middle of an otherwise well laid out base then DO NOT DROP YOUR TROOPS IN THERE. Players do this as a way of trapping inexperienced players - the blank sninja might look like an easy way of getting inside the walls, however in reality there is generally a huge amount of splash and point defence focussed on that one sninja so that when you drop your troops they are wiped out before they can even attack.
Spells can be a fantastic way of boosting an attack to get that extra lot of Trophies or some extra Loot.
Rage and Heal
Generally it is best to drop these spells a few squares in front of where your troops are headed so that the troops walk into them. They work best on troops with high damage (for Rage) and high hit points (for Heal). Multiple Heal spells do stack and provide more healing, however multiple Rage spells do not provide increased damage and sninjad above the level of one spell.
Lightning
The primary use for lightning currently is lower townhall levels using it to attack Dark Elixir storages of higher townhall level on revenge, or when they are unable to get to the Dark Elixir using normal troops. The other use for lightning is to drop it on an Air Defence or Mortar at the start of an attack to increase the odds of winning or getting the loot.
For Farming
Due to their cost spells are only effective for farming when the extra loot they allow you to get is higher than the cost of the spells used. This is almost never the case when raiding collectors and is rarely the case when raiding storages.
Always queue up troops before you start searching for an attack. Troops will start being made from the moment you start searching for an attack (not just from when you start attacking). If you don't find a battle and come back to your base with full troops then no troops will be made, however if you use only a small amount of troops or are searching for a long time then you can often come back to your base and have full army camps ready to go straight away.
A good rule of thumb is to queue up a minimum of 8 minutes worth of troops, for example 20 Archers or 4 Giants/Wallbreakers per barracks. Queue up the troops that you are most likely to use in the battle or one that you don't mind having more of in the event you don't use them (usually Archers are best).
Barracks distribution is a bit of an art form - the goal is to setup your troops so that they all finish at the same time and hence minimize your waiting time.
For most people the best troop to queue first (ie: before you start attacking) are Archers - they are both the most versatile and the most accepted donation, so that you are never without donation troops when a clan member requests.
You then queue up the remainder of your troops, trying to distribute them evenly between your barracks. If you are using Giants or Wallbreakers where you will often have variable numbers that you will need to adjust based on the last battle it is generally best to put them directly following the Archers and then to have Barbarians or Goblins as the last troop queued up. That way you can adjust the distribution of Barbarians or Goblins based on how many Giants/Wallbreakers you need to make. So for example if you have to make 10 Wallbreakers and 20 Barbarians you can distribute them as: 3 Wallbreakers, 2 Barbarians in 2 barracks and 2 Wallbreakers, 8 Barbarians in 2 barracks.
Quanninja that are divisible by both 2, 3 and 4 are great to use because you can distribute them easily even if you are upgrading some barracks. For example 60 Archers or 12 Giants.
- 6 Barbs = 1 Giant/Wallbreaker
- 5 Archers = 1 Giant/Wallbreaker (almost)
- 4 Goblins = 1 Giant/Wallbreaker
As an example, this is what you might do if you use the Healer/Giant strategy with 4 Barracks and 220 troops.
- Fill your Army Camps with 18 Giants, 80 Archers, 1 Healer and 16 Barbarians
- Queue up 20 Archers in each barracks before you attack
- Start looking for a battle and click next until you find someone with over 150K gold
- If you have clicked next for over 30 times and still haven't found anyone worth attacking then look for a base with over 80K loot in the collectors and just use 20-80 archers to take the loot (ie: look for empty xbows, no league shield, full elixir pumps, sleeping builders, zeroes at the end of loot quanninja)
- When you find someone worth attacking deploy the troops you need to win and go back to your base - if you have only used archers then you will be ready to look more and you can top up the queue to 20 archers each first
- If you have used more than just archers then fill up the queue with the extra troops you need. For example if you used all your troops then your queue would look like this:
- Barracks 1: 20 Archers, 1 Healer, 1 Wallbreaker, 7 Barbarians
- Barracks 2: 20 Archers, 6 Giants, 3 Wallbreakers, 3 Barbarians
- Barracks 3: 20 Archers, 6 Giants, 3 Wallbreakers, 3 Barbarians
- Barracks 4: 20 Archers, 6 Giants, 3 Wallbreakers, 3 Barbarians
- After you have filled up the queue it is also a good idea to queue up the next 20 archers in each barracks at the end - so that when your army camps are full again you can just attack straight away.
- If the first batch of 20 archers in each barracks aren't finished when you come back then you can queue up the rest of the troops and then delete the archers from the front of the queue and add them on to the 20 at the end.
- If you need to donate to Clan Members then donate archers and then add them on to the 20 at the end of each queue.
- If the barracks are set to finish creating troops at the exact same time they will always finish in the same order - line up your barracks in that order to make it easier to know where the troops will come from. If you need to donate 5 archers you can put 21 in each barracks and 22 in the first barracks and it will work perfectly every time.